Cutting back on sodium shouldn’t mean sacrificing taste, and this recipe is a testament to that philosophy. This no salt added Italian sausage recipe cuts the sodium without compromising on the authentic taste you love. This straightforward recipe uses a mix of lean meats, aromatic herbs, and savory spices to deliver a satisfying, healthier option for your meals.
Italian sausage is excellent as a pizza topping or as an ingredient in a baked pasta dish. It is also ideal to add to a breakfast quiche. But store-bought sausages are packed with salt and are usually high in fat. Plus they typically contain a host of other ingredients you would probably prefer to keep off your table.
This recipe is ridiculously easy. It is a simple mixture of ground pork and some robust seasonings. The longest part is waiting for the spices to permeate through the pork. (More on that in a minute.)
START WITH NO SALT ADDED GROUND MEAT
When you are at the grocery store it is important to read the nutrition labels. To keep the salt as low as possible, you must start with ground meat that has no added salt. Pork, and all meats for that matter, naturally contain sodium. So you aren’t looking for 0mg of salt, just aiming to keep it as low as possible.
Smithfield has ground pork that contains 75mg of sodium per serving. You want to be in that ballpark when you select your meat. I’ve seen some ground pork packages serving up salt in the range of 80-90 milligrams, which is still ok. But you want to try to stay below 100mg of sodium per serving.
I prefer to use ground pork because I feel it gives that classic sausage taste. But ground chicken, turkey, or beef would work too. Whichever ground meat you choose, just make sure it is salt-free.
DON’T SKIP THE REFRIGERATION TIME
Good Italian sausage has a robust flavor profile. For this no salt added Italian sausage to pack a powerful flavor punch, you need to let the meat and seasoning marry. This takes time.
The recipe calls for a minimum of four hours in the refrigerator. You need to allow at least this amount of time for the herbs and spices to do their thing. You will be surprised at how quickly the aroma will fill your refrigerator, but don’t pull it out before four hours have passed.
If you want the maximum flavor profile, you should let this sit for 24 hours. I know this is a long time, but trust me it will be worth it. I used to only do the four-hour minimum, and the sausage was tasty. Then I tried letting it sit for the full 24 hours and discovered it takes the flavor to a whole new level.
It is because of this time-consuming step that I typically double or triple the recipe. I use what I need for the dish at hand and then I freeze the rest of the uncooked meat. This saves me a lot of time down the line!
A word of caution: make sure you distribute your seasonings equally! I typically make three single batches at one time. I use one immediately and freeze the other two. Mixing them individually ensures that one batch doesn’t get a high concentrate of seasoning.
Now, let’s dive into a delicious, no-nonsense approach to homemade Italian sausage.
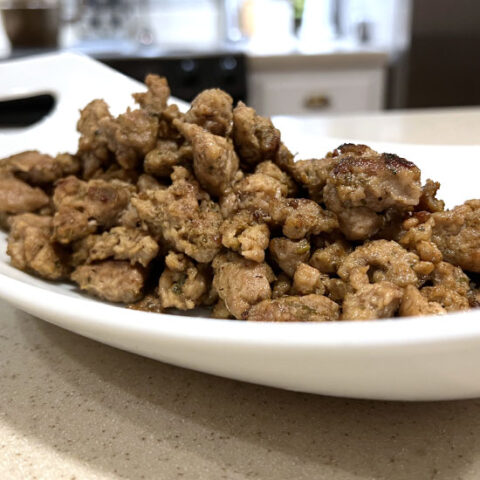
No Salt Added Italian Sausage
Flavorful no salt added Italian sausage is perfect for pizzas, pasta dishes, soups, and more.
Ingredients
- 1 pound of ground pork (make sure it is salt free!)
- 1 teaspoon of dried parsley
- 1 teaspoon of paprika
- ½ teaspoon of dried oregano
- ½ teaspoon of fennel seeds or ground fennel
- ½ teaspoon of garlic powder
- ¼ teaspoon of dried rosemary, crushed
- ⅛ teaspoon of black pepper
- ⅛ teaspoon of dried thyme
- ⅛ teaspoon of red pepper flakes (to taste)
Instructions
- Combine all ingredients in a large bowl and mix well, ensuring your spices are equally distributed throughout.
- Cover with saran wrap and refrigerate for at least 4 hours; letting it sit for 24 hours is amazing!
- Cook in a skillet until no pink remains.
Notes
- The meat you start with mustn't have any added salt. Read the ingredients label! Using pork will give it that classic sausage taste but you can use ground turkey or chicken.
- You MUST put this in the refrigerator for at least four hours. That gives the spices time to permeate throughout the meat. If you skip this step your sausage will not be as flavorful. If you have the time, let it sit for 24 hours for maximum flavor.
- This recipe can be doubled. If you only need half the mixture, just freeze the uncooked mixture for future use. I would not recommend freezing the cooked sausage because the flavors aren't as vibrant when you reheat it.
- The red pepper flakes are up to your taste buds. I happen to like a bit of heat, so I use more than the ⅛ teaspoon called for in the recipe. If you don't like heat or are serving this to children, feel free to leave it out!
- Sausage can be formed into patties before cooking. Cook over medium heat for about 4-5 minutes per side or until cooked through.
Mix it up with some different add-ins:
- ½ teaspoon of brown sugar or a teaspoon of pure maple syrup to make a sweet Italian sausage.
- ⅛ teaspoon of smoked paprika
- ⅛ teaspoon of cayenne pepper
Recommended Products
As an Amazon Associate, I earn from qualifying purchases. For complete information please read the disclosures page (link at the bottom of this page).

Nutrition Information
Yield 6 Serving Size 1 Amount Per Serving Calories 233Total Fat 16gSaturated Fat 6gTrans Fat 0gUnsaturated Fat 9gCholesterol 71mgSodium 50mgCarbohydrates 2gFiber 1gSugar 1gProtein 20gNutritional information is provided as an estimate. Nutritional content may vary due to several factors such as how much of an ingredient is used vs. how much will actually be eaten, brand differences, and more. To ensure the most accurate nutritional information, the reader should make calculations based on the ingredients actually used, using their own preferred method, or consulting with a licensed nutritional expert. This Website is not intended as a source of nutritional or food safety advice, and its readers assume full responsibility for any decisions made regarding their own health and safety. Nutritional information calculated by Nutritionix