This recipe will provide you with a flaky no salt added pie crust in almost no time. Correction, it will provide you with enough dough to make TWO 9-inch no salt added pie crusts! That’s enough dough to create two pie shells or one pie shell and one pie topper.
From fruit pies to savory dishes, this no salt added recipe will become a go-to in your kitchen. I use this pie dough to make low sodium apple and pumpkin pies. I even use it to make chicken pot pies and breakfast quiches.
The tang of vinegar replaces the need for salt in a crust without becoming overpowering. Nobody at your table will be wise to the fact that this is a low sodium recipe.
Why make your own pie crust?
Not everyone wants to spend the time making, or cleaning up, homemade pie crust. But when you go from scratch, you cut a tremendous amount of salt from your dish. The chart below takes a look at the sodium found in store-bought pie crusts. As you can see, you save a lot of salt by going homemade!
| BRAND | SODIUM PER SERVING | NOTES |
|---|---|---|
| LoSo Foodie | 1 mg | Made from scratch |
| Pillsbury | 130 mg | Sold pre-rolled |
| Marie Callander’s | 50 mg | Sold in a pie tin |
| Mrs. Smith | 90 mg | Sold pre-rolled |
| Food Lion | 75 mg | Deep dish; sold in a pie tin |
| Publix | 140 mg | Sold pre-rolled |
Bulk prepare and freeze for another day
Why not freeze a few pie shells for use later on? If I’m going to make a mess in the kitchen for one no salt added pie crust, why not mess it up for four or five? Personally, I do not double the recipe because I find the larger amount of dough difficult to work with. I simply just repeat the recipe multiple times.
I purchase some tin foil pie pans, and place my dough into those. Then pop them into the freezer. I typically stack them all in a single freezer bag, placing parchment paper between each pie tin. Just remember to let the crust thaw in the refrigerator for a few hours before you place it in the oven. Your pie dough should be cool but pliable.
No Salt Added Pie Crust
This no salt added pie dough will become the foundation of all your low salt pies and quiches.
Ingredients
- 2 cups of all-purpose flour
- 2/3 cup of unsalted butter, cut into 1/2-inch pieces and chilled
- 5 tablespoons of cold water
- 2 tablespoons of apple cider vinegar
Instructions
- Combine the cold water and vinegar in a measuring cup and set aside.
- In a large bowl, add all-purpose flour and cold butter.
- Blend flour and butter/shortening together using the back of a fork or a pastry cutter until the mixture resembles coarse sand. I do not recommend using hands as the heat will melt the butter.
- Pour the water and vinegar mixture, 1 tablespoon at a time, and mix with your fork/pastry cutter until the dough is fully moistened. You want the dough to hold together when pinched. Be careful not to overwork the dough. Note: If your dough is too dry, simply add an extra tablespoon of water.
- Divide in the dough in half. Form each half into a ball.
- Flatten each ball with the palm of your hand until it is 1-inch thick. Wrap in plastic wrap that has been lightly sprayed with non-stick cooking spray. Place in the refrigerator for at least 30 minutes to rest.
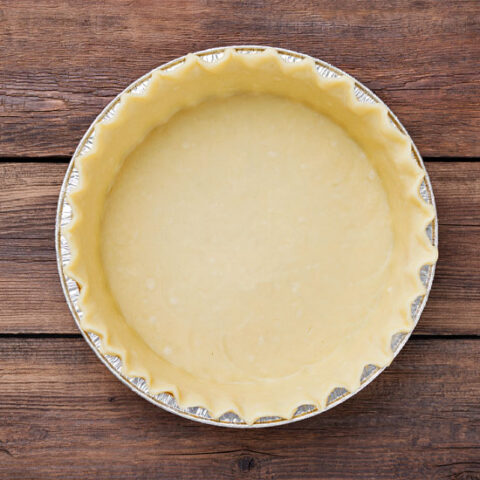
- After dough has chilled, remove from refrigerator. On a lightly floured surface, roll the dough from center to edges into 9-inch circle. (Or larger if needed)
- Your pie dough is ready to be placed in your pie plate! If you are looking to pre-bake your pie crust, see instructions in notes section below.
Notes
- This recipe creates two disks for pie dough. Enough to provide the crust for two pies or the curst and topping for a single pie.
- You can opt to use shortening instead of unsalted butter. It would be a 1:1 swap, meaning you would use 2/3 cup of shortening to replace the butter. Crisco All-Vegetable Shortening has zero sodium but be sure to check the label to confirm you have the salt-free version!
- This recipe makes enough pie dough for the bottom of one pie pan. If you need more crust for the top, you'll need to make up a second batch. I do not double the recipe because I find a large amount of dough to be difficult to work with. This recipe is so simple that you won't have any trouble going through the steps twice.
- If you are making a pie as a gift, why not use an aluminum pie pan? That way you don't have to worry about getting a dish back. Aluminum pie plates are also great to have on hand during the holidays when you are cooking up multiple pies for family gatherings.
IF YOU WANT TO PRE-BAKE YOUR PIE CRUST
- Preheat oven to 400 degrees F.
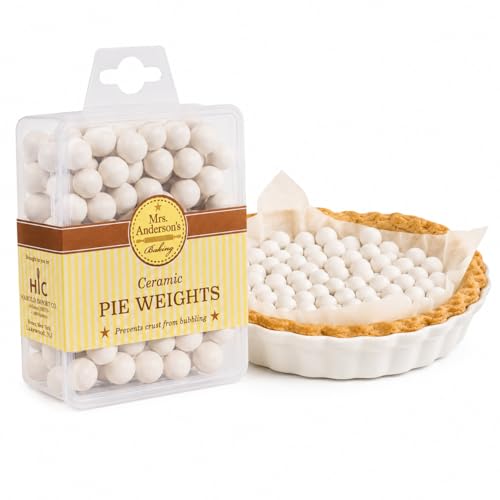
- Using a fork, poke holes randomly across the base of the pie shell. This will help to prevent big bubbles from forming.
- Line the pie shell with parchment paper. Fill with pie weights or dried beans. This will help to ensure your pie shell bakes flat.
- Bake crust for 15-20 minutes or until the curst is just beginning to get that golden brown color. Don't overbake!
- Add your filling and bake according to the directions in that recipe.
Recommended Products
As an Amazon Associate, I earn from qualifying purchases. For complete information please read the disclosures page (link at the bottom of this page).


Nutrition Information
Yield 8 Serving Size 1/8 crust Amount Per Serving Calories 208Total Fat 14gSaturated Fat 1gTrans Fat 0gUnsaturated Fat 12gCholesterol 0mgSodium 2mgCarbohydrates 18gFiber 1gSugar 0gProtein 3gNutritional information is provided as an estimate. Nutritional content may vary due to several factors such as how much of an ingredient is used vs. how much will actually be eaten, brand differences, and more. To ensure the most accurate nutritional information, the reader should make calculations based on the ingredients actually used, using their own preferred method, or consulting with a licensed nutritional expert. This Website is not intended as a source of nutritional or food safety advice, and its readers assume full responsibility for any decisions made regarding their own health and safety. Nutritional information calculated by Nutritionix
Tried making this however, my crust would either fall apart when trying to put it in the pie pan or it would stick to the wax paper when trying to trying to put it in the pan. Any suggestions?
Hi JB,
Sometimes you might have to add a bit more liquid. It can depend on the time of year and climate. (Believe me, when someone told me that I thought they were messing with me. But they were correct!) So, if your dough is breaking apart then I would suggest adding some additional liquid. You could use either water or milk. Personally, I would start off with like half of a teaspoon of milk. Add that and then knead the dough a bit to see if it comes together. Still crumbly? Add another small amount of liquid.
You want to add the liquid in small amounts because you can always add more. If you add too much upfront, your dough will be runny.
Hope that helps!
This is basically my go to for pie crust now. I don’t always put in apple cider vinegar as I don’t appreciate how it tastes with sweeter things but I’ve found it still works perfectly fine with water. Thank you for putting this recipe out. When I first started looking for low sodium recipes this was incredibly helpful.